Job Type
This page is used to create estimate and public products as well as entries to Create New Job option where, normally, users upload files to be printed. Producers create a template for the product.
Job type

Job Types: Type of Job offered i.e. magazine or brochure
Job services: Options that e associated with the jobs types that are available, i.e. stapling, punching
Job Pricing: Pricing for the job services
Price matrix: Pricing for the job excluding the job services
To create a Job Type:
1.From the Main Menu select Manage Products>Public Products> Job Types.
Public Products/Job Types

2.Click on Add new job type link to access the Manage Job Types screen.
Manage Job Types screen
2.Click on Add new job type link to access the Manage Job Types screen.
Manage Job Types screen

Fill in the parameters as follows:
Job Type: Internal name or code of the product, this is used when adding such product to a company catalogue
Job Type name: The name displayed for the user to see
Description: Description of the product (optional)
Enable Upload: (Yes / No) – Ask users to upload a file
Show Public: Check if you want the product allowed to all your companies that have Create A Job enabled
Include Price Matrix: Follow a certain price matrix for this product. A price matrix is defined for each type of Print. For example, a matrix is defined for Letter size paper with colour print. The price matrix, in this case, requires number of pages and copies to find the price.
Option: Click on the drop-down menu and select the option you are offering with this job type
Colour: will display Colour option only
Black and White: will display Black and White only
Colour and Black and White: will display both options to the customer to pick from.
Wide Format: will show Wide format option only.
3.Click “Insert” to save the new Job Type.
4.Associate a thumbnail to this Job Type, click the  icon to edit the entry and use the upload feature to upload a web image (.png, .jpg, .gif).
Note: Go ePower makes no attempt is made to resize this thumbnail.
Associate a thumbnail to Job Type,
5.Add a Thumbnail to display an image to represent your product by clicking select and browsing your computer for the image and click Update.
Delete Thumbnail
If you wish to change a Thumbnail that you have already uploaded Click the edit icon  and select the Delete Thumbnail link.
Create a Child Record for Job Types - Service
Once you have Setup Job Type, Job Services, Job Service Pricing and Pricing Matrix you can create Child Records for your Job types to associate the Services and pricing to the Job.
To create Child records for Job Types
1.From the Backend Menu select Services - Job Type.
2.Click the expand folder icon  next to service you are creating the record for.
Add service for Job Types

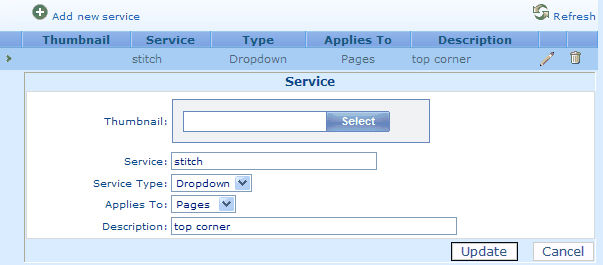
3.Click on the Add new service detail link.
4.Select a service to offer with this job from the drop down menu.
Add new service detail

5.Click the insert icon to add the record.
Selecting services (children of Job Types) for the new Job Type
To Select Services for Job Types:
1.Expand the New Job Type clicking the expand icon 
2.to the left of the name, this will reveal the option to add Service.
3.Click Add Service and select a service from the dropdown list.
Any number of services can be added this way. Each service will appear as a separate Wizard page to the customer (controlled by Previous and Next buttons)
Important Note: The above steps are all that is needed to add a Job Type but some of the information that we simply selected above need to be created before hand, i.e. the price matrix for different paper sizes as well as the services and their details and pricing.
Was this article helpful?
That’s Great!
Thank you for your feedback
Sorry! We couldn't be helpful
Thank you for your feedback
Feedback sent
We appreciate your effort and will try to fix the article