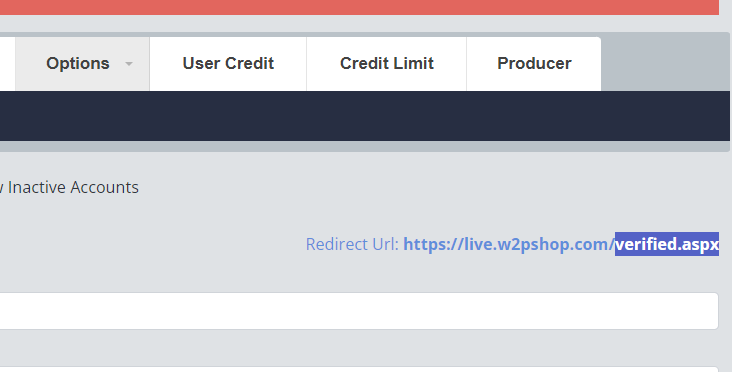
This can be found under the Producer Settings -> Options (Contact Support to enable)
This guide explains each field on the Go ePower SSO Setup screen and where to find the corresponding values, depending on which Identity Provider (IdP) you're connecting: Google, Azure AD, PingOne, or a Custom OAuth2/OIDC provider.
Before You Start
Go ePower's SSO integration uses the industry-standard OAuth2 / OpenID Connect (OIDC) protocol. Regardless of which provider you choose, you (or your IT/Identity team) will need to register Go ePower as an "Application" or "Client" inside that provider's admin console. Registering the application is what generates the Client ID, Client Secret, and endpoint URLs you'll enter into Go ePower.
You will also need to provide the IdP with a Redirect URI / Callback URL — this is supplied by Go ePower support or shown on the SSO setup screen — so the IdP knows where to send users back after they log in. This would be found in the top corner of the SSO page.
Field-by-Field Reference
Field | What It Is | Where to Get It |
Name | A friendly label for this SSO connection (internal use only, shown to admins). | You choose this — e.g. "Corelogic Live v2," "Company Azure AD." |
Type | Which IdP template Go ePower should use: Custom, PingOne, Google, or Azure AD. | Choose based on which system your company uses to manage logins. |
EnvID / Tenant | The unique identifier for your organization's environment within the IdP. | Provided by your IdP admin console (see provider sections below). Not all providers require this — leave blank if not applicable. |
Client ID | The public identifier for the Go ePower application, generated when you register it with the IdP. | Generated by the IdP when you create/register the application. |
Client Secret | A private password-like key paired with the Client ID, used to securely authenticate Go ePower to the IdP. | Generated by the IdP at the same time as the Client ID. Treat this like a password — do not share it. |
Endpoint (Authorization Endpoint) | The URL Go ePower sends users to in order to log in. | Provided in the IdP's OAuth2/OIDC documentation or app registration screen. |
Scope | Defines what user information Go ePower is allowed to request (e.g. openid, profile, email). | Set based on IdP requirements — openid is the minimum for most OIDC providers. |
Response Type | Tells the IdP what kind of response to send back. Almost always code. | Standard OAuth2 value — leave as code unless your IdP instructs otherwise. |
Additional String | Any extra parameters to append to the login request, beyond what Go ePower already includes automatically (response_type, client_id, redirect_uri, scope, state). | Only needed if your IdP requires custom parameters — check IdP docs. |
Token Endpoint | The URL Go ePower uses behind the scenes to exchange the login code for an access token. | Provided in the IdP's OAuth2/OIDC documentation or app registration screen. |
Logout Endpoint | The URL Go ePower sends users to when logging them out of the IdP as well. | Provided by the IdP (optional — leave blank if single-logout isn't required). |
Login Type | Controls the login experience:<br>• Click a Button to Login (Allow ePower Login) — user can choose SSO or a standard Go ePower login.<br>• Click a Button to Login (Do not Allow ePower Login) — SSO only, no standard login option shown.<br>• Login Automatically — user is redirected to the IdP immediately, no button click required. | Chosen based on your company's security policy. |
Update info from Account after every login | If checked, Go ePower refreshes the user's profile info (name, email, etc.) from the IdP every time they log in. | Optional — enable if the IdP is the source of truth for user info. |
Sign Off from Account after signing off from ePower | If checked, logging out of Go ePower also logs the user out of the IdP session. | Optional — enable for stricter single-logout behavior. |
Active | Enables/disables this SSO connection. | Check once configuration is complete and tested. |
Note on {EnvID} and {ClientID}: Wherever these placeholders appear in an endpoint field, Go ePower automatically substitutes them with the values you entered above. You may see this pattern in the URL template your IdP gives you (e.g. https://auth.{provider}.com/{EnvID}/as/authorization.oauth2).
Provider-Specific Instructions
1. Custom (Generic OAuth2 / OIDC)
Use this option for any provider not explicitly listed (e.g. Okta, PingFederate, CoreLogic, or an internal identity system).
- In your IdP's admin console, create a new OAuth2/OIDC Application (sometimes called a "Client" or "Connected App").
- Set the Redirect URI to the value provided by Go ePower support.
- The IdP will generate a Client ID and Client Secret — copy both into Go ePower.
- Locate the provider's Authorization Endpoint and Token Endpoint — these are usually listed on the app's "Endpoints" or "Well-Known Configuration" page (often a URL ending in /.well-known/openid-configuration).
- Set Scope to openid (add profile email if you want those details passed through).
- Set Response Type to code.
- If your IdP uses a tenant or environment identifier in its URLs (like CoreLogic's {EnvID}), enter it in EnvID/Tenant.
2. Google
- Go to the Google Cloud Console → APIs & Services → Credentials.
- Create an OAuth 2.0 Client ID (Application type: Web application).
- Add the Go ePower Redirect URI under Authorized redirect URIs.
- Copy the generated Client ID and Client Secret into Go ePower.
- EnvID/Tenant is not typically needed for standard Google accounts (leave blank), unless using Google Workspace domain restrictions.
- Google's standard endpoints are:
- Authorization Endpoint: https://accounts.google.com/o/oauth2/v2/auth
- Token Endpoint: https://oauth2.googleapis.com/token
- Set Scope to openid email profile.
3. Azure AD (Microsoft Entra ID)
- Go to the Azure Portal → Microsoft Entra ID → App registrations → New registration.
- Register a new app and add the Go ePower Redirect URI under Redirect URIs (Web).
- From the app's Overview page, copy the Application (client) ID and Directory (tenant) ID — the tenant ID goes into EnvID/Tenant.
- Under Certificates & secrets, create a new Client Secret and copy its value immediately (it's only shown once).
- Endpoints follow this pattern (replace {tenant} with your Directory/Tenant ID):
- Authorization Endpoint: https://login.microsoftonline.com/{tenant}/oauth2/v2.0/authorize
- Token Endpoint: https://login.microsoftonline.com/{tenant}/oauth2/v2.0/token
- Logout Endpoint: https://login.microsoftonline.com/{tenant}/oauth2/v2.0/logout
- Set Scope to openid profile email.
4. PingOne / PingFederate
- In the PingOne admin console, go to Applications → Add Application → OIDC Web App.
- Add the Go ePower Redirect URI under Redirect URIs.
- Copy the Client ID and Client Secret from the application's Configuration tab.
- Your Environment ID (found at the top of the PingOne console or under Environment Properties) goes into EnvID/Tenant.
- Endpoints follow this pattern (replace {EnvID}):
- Authorization Endpoint: https://auth.pingone.com/{EnvID}/as/authorization.oauth2
- Token Endpoint: https://auth.pingone.com/{EnvID}/as/token.oauth2
- Logout Endpoint: https://auth.pingone.com/{EnvID}/as/signoff
- Set Scope to openid.
Testing Checklist
- [ ] Client ID and Secret entered correctly (no extra spaces)
- [ ] Redirect URI registered exactly matches what Go ePower provided (including https:// and trailing slashes)
- [ ] Authorization and Token endpoints resolve correctly (test by pasting into a browser where applicable)
- [ ] Scope includes openid at minimum
- [ ] Login Type matches desired user experience
- [ ] Test login with a non-admin test account before setting Active
- [ ] Confirm Active is checked once testing succeeds
This guide reflects the standard Go ePower SSO setup screen. Field labels and required values may vary slightly depending on system version — confirm against your specific IdP's current documentation, as identity provider consoles are updated periodically.
Was this article helpful?
That’s Great!
Thank you for your feedback
Sorry! We couldn't be helpful
Thank you for your feedback
Feedback sent
We appreciate your effort and will try to fix the article